
The island has quietly replaced the kitchen table as the spot where everything happens. Morning coffee, homework, dinner prep, laptop work. All of it lands on the same surface. The right kitchen island ideas start with what’s hidden inside the island and underneath it, not just what sits on top. Here’s how to plan one that works as hard as you do.
Key Takeaways
☑️ A well-sized island needs 36-42 inches of clearance on all open sides; anything tighter becomes a daily frustration
☑️ Built-in features like charging stations, trash pull-outs, and appliance garages add function that looks alone can’t match
☑️ Waterfall countertops and two-tone finishes lead 2026 island design, but both bump up labor costs worth budgeting for
☑️ Small kitchens can still fit a 24-to-36-inch-deep island, especially with a portable or rolling option
☑️ Electrical and plumbing work for cooktop or sink islands needs to happen before cabinets arrive, not after
Sizing Your Island to Your Kitchen
Ever walk into a kitchen where the island swallows the room? That’s the most common mistake contractors see. A gorgeous 8-foot island means nothing if you can’t open the dishwasher without bumping into it.
One rule holds across most kitchen ideas with island layouts. Keep 36-42 inches of clearance on every open side. Planning a cooktop on the island? Push that to 42-48 inches so nobody brushes against a hot burner when someone walks behind the cook. The National Kitchen and Bath Association recommends islands occupy no more than 10% of total floor space. That gives you a solid starting point whether your kitchen is 120 square feet in a condo or 400 square feet in a Bay Area colonial.
| Kitchen Size | Recommended Island | Min. Clearance |
|---|---|---|
| Under 150 sqft | Portable or rolling cart (24″ x 36″) | 36″ |
| 150-250 sqft | Fixed island, roughly 4′ x 2.5′ | 36-42″ |
| 250-400 sqft | 6′ x 3′ to 8′ x 4′ | 42-48″ |
| 400+ sqft | 8’+ single or double island | 48″+ |
For small kitchen island ideas, going narrow changes the game. A 24-inch-deep island with open shelving underneath eats far less floor space than a standard 36-inch-deep base and still gives you counter space plus storage. Not sure an island will fit? Test the footprint with painter’s tape on the floor before committing to anything permanent. Walk around it for a full day. Open the fridge, the oven, the dishwasher. You’ll know fast if the clearance works.
Built-In Features That Earn Their Spot
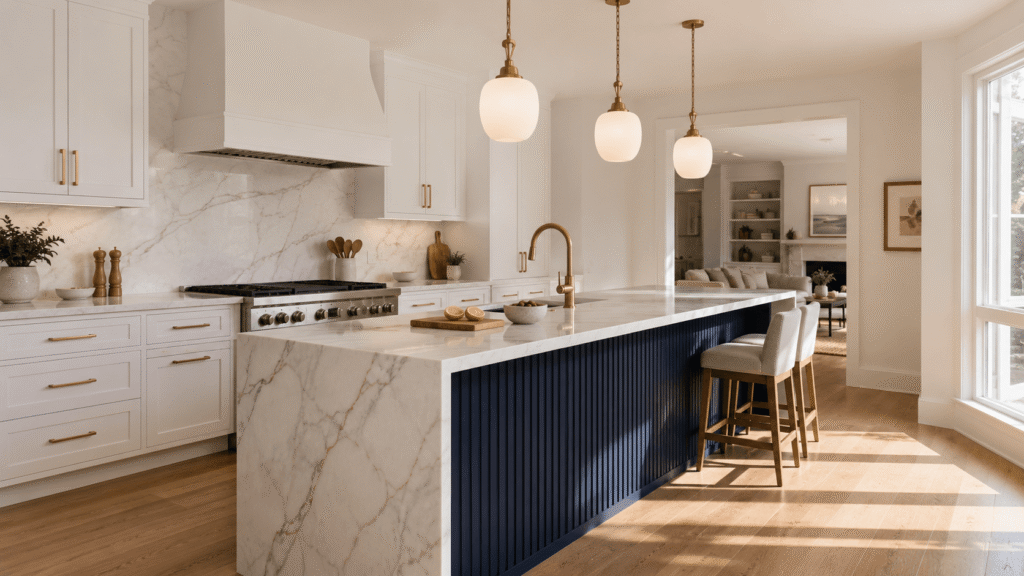
What separates an island you love from one you work around comes down to what’s built into it. A flat slab on top of a plain base cabinet looks fine in a photo. In a working kitchen? The hidden details carry the weight.
Storage That Disappears
Deep drawers with vertical dividers hold baking sheets, cutting boards, and trays upright instead of stacked flat. Trash and recycling pull-outs keep bins hidden but one handle-pull away from the cooking area. Appliance garages (a cabinet section with a roll-up or lift door) swallow the stand mixer, blender, and toaster until you need them. These upgrades typically add $500-2,000 to your cabinet order depending on how many you include. Blum and Rev-A-Shelf are the go-to hardware brands for pull-out systems, and most contractors spec them by default.
Integrated Appliances
Dropping a cooktop into the island turns it into the primary cooking station, but the infrastructure has to come first. Gas cooktops call for a dedicated gas line run to the island location. Electric or induction models draw from a 240V circuit. Both demand ventilation, either an island-mount range hood or a downdraft system that rises from behind the cooking surface. Sink islands require plumbing rough-in through the floor, and most contractors place the dishwasher directly beside the sink to keep drain runs short and reliable.
None of this gets added after the fact without tearing things apart. Planning a kitchen island builtin cooktop or sink means your contractor needs those specs locked down before the subfloor goes down and the cabinet order ships.
Tech and Convenience
Pop-up outlets that sit flush when not in use keep the countertop clean for food prep. Built-in USB and wireless charging pads turn the island into a device hub for the whole family. Under-counter LED strips add task lighting where you need it and ambient glow for evening entertaining. Every one of these features needs electrical rough-in before the island frame gets built. Retrofitting an outlet into a finished island with a stone top runs 3-4x the cost of doing it during construction.
Design Moves That Define the Look
Function first. But once the guts are planned, the surface treatment and finish choices turn a basic island into something people remember. These are the kitchen island decor ideas driving most design conversations in 2026.
Waterfall countertops, where stone wraps from the surface down one or both sides to the floor, dominate kitchen island design ideas this year. The effect is clean and sculptural, but it adds 30-40% to your slab cost because each side panel requires a separate mitered cut and a nearly invisible seam. Worth it on a statement island. Harder to justify if the budget is tight.
Two-tone finishes keep gaining ground. Paint the island in bold navy, forest green, or matte charcoal while the perimeter cabinets stay white or warm wood. That contrast gives the island its own gravity in the room and keeps a large kitchen from feeling monotone. Fluted and reeded panel faces on the island front add texture and depth, turning a flat cabinet box into something that reads more like a freestanding piece of furniture than a built-in.
Warm wood islands, especially white oak and walnut, work well in kitchens that lean modern-organic. The grain softens an all-stone or all-white kitchen and bridges the cooking zone with adjacent living spaces. If you’re already planning broader remodeling solutions for modern living, the island finish is one of the easiest places to set the tone for the entire ground floor.
When a Small Kitchen Can Still Fit an Island
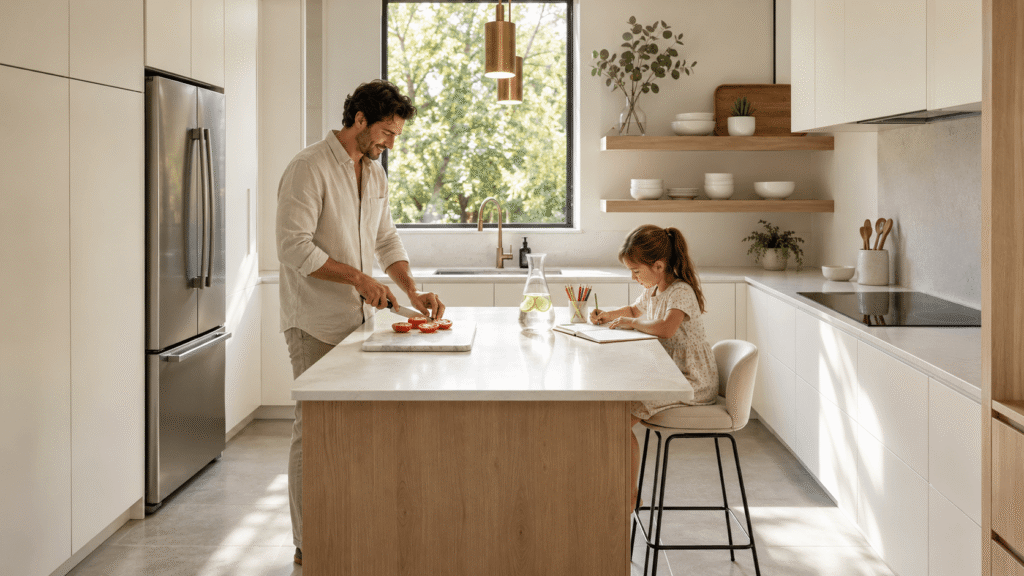
Not every kitchen has 250 square feet to work with. A smaller footprint doesn’t automatically rule out an island, though.
Portable islands on locking casters roll out when you need prep space and tuck against the wall when you don’t. A narrow butcher block table with open legs keeps the floor visible and the room feeling bigger than a closed-base cabinet would. Freestanding pieces that double as a prep station and a two-seat dining spot earn their square footage twice over.
Here’s the honest contractor take. If your layout leaves you under 36 inches of clearance on any side with an island in place, a peninsula connected to the perimeter cabinets will serve you better. Same counter space. Same seating. No blocked walkway. Sometimes the smartest small kitchen island ideas involve skipping the freestanding island entirely and extending what you already have.
What Your Contractor Plans Before the Island Goes In
A kitchen island looks like it’s about cabinetry and stone. Underneath, it’s about infrastructure. Skipping the prep work turns a $15,000 island into a $20,000 problem when things need to come apart and get redone.
Stone countertops (granite, quartz, marble) weigh roughly 18-20 pounds per square foot at standard 3cm thickness. A 6-foot by 3-foot island slab tips the scale around 325-360 pounds. The base cabinets and the floor beneath them need to carry that load for decades. Bouncy or uneven subfloor? Fix it before anything else goes on top.
Electrical rough-in for outlets, under-cabinet lighting, and any integrated appliances has to happen while the walls and floor are still open. Same story for plumbing if you’re adding a sink or dishwasher. Waiting until the island is built and finished to figure out where the water lines run means cutting into completed work, which doubles labor cost and adds a week or more to the schedule.
EcoStar assigns a dedicated project manager to every kitchen remodel, and the PM coordinates plumbing, electrical, and cabinet trades in sequence so nothing steps on the next crew’s work. That coordination, backed by a 2-year workmanship warranty, is what keeps kitchen remodelers from running into preventable delays across Los Angeles, , , and the Bay Area.
Your best kitchen island ideas won’t come from a Pinterest board. They’ll come from matching what you love looking at with what works when you cook, eat, and live in the space every day. Get the infrastructure right, and the pretty part comes easy after that.
FAQ
How much does a kitchen island cost?
A basic pre-built island runs $500-3,000. A custom built-in with stone countertop, plumbing, and electrical typically falls between $5,000 and $15,000 depending on size, materials, and features. In EcoStar’s markets (LA, , Bay Area, ), most custom islands land in the $8,000-12,000 range.
What is the ideal size for a kitchen island?
Most functional islands measure between 4 and 8 feet long and 2 to 4 feet deep. The NKBA recommends 36-42 inches of walkway on all open sides. For seating, add a 12-15 inch overhang on the stool side. If you’re torn between two sizes, go smaller. You can always add a portable cart, but you can’t widen a walkway without ripping out cabinets.
Can I add a sink or cooktop to my island?
Yes, but both require advance planning. A sink needs water supply and drain lines routed through the floor, ideally on a straight vertical run from the basement or crawl space. A cooktop needs its own dedicated circuit and a ventilation solution, either an island hood or a pop-up downdraft behind the burners. All rough-in has to happen before island cabinets go in.
Do kitchen islands increase home value?
In most mid-to-upper-range markets, a well-built island adds resale appeal. Kitchen remodels typically recover 50-75% of their cost, and the island is often the feature buyers notice first. A stone countertop with functional storage and built-in seating signals a finished, updated kitchen.
How much space do I need around a kitchen island?
At least 36 inches on all sides for comfortable movement. If the island includes a cooktop, bump that to 42-48 inches on the cooking side. In a galley or U-shaped kitchen, measure from the nearest counter or appliance front, not from the wall, since open doors and pulled-out drawers eat into your usable walkway.