
A two-car garage gives you roughly 400 square feet of open floor on a concrete slab, four walls, a ceiling, and an electrical panel within arm’s reach. That’s more usable space than most commercial gym studios rent per client. Converting that square footage into a garage home gym costs a fraction of what you’d spend on a home addition, and the monthly gym membership you cancel starts paying it back from day one. Here’s how to plan the conversion from bare slab to finished training space.
Key Takeaways
☑️ A standard two-car garage (roughly 400 sq ft) fits a full strength, cardio, and recovery setup with room to spare
☑️ Zone planning before buying equipment prevents expensive rearranging and keeps different training styles from colliding
☑️ Rubber flooring ($2 to $8 per square foot) protects both the concrete slab and your joints during deadlifts, box jumps, and barbell drops
☑️ Climate control matters more than equipment brand, as insulation and a mini-split keep the space usable 12 months a year in any region
☑️ A full contractor-led garage gym conversion runs $15,000 to $30,000, while a solid DIY setup starts under $2,000
Why Your Garage Already Has What Most Gyms Need
Most home gym builds start with a problem. No space. Where do you put a power rack, a rower, and a stretching area in a house that barely fits the furniture you already own? A garage skips that problem entirely.
A single-car garage averages 12 by 20 feet (roughly 240 square feet). A two-car garage stretches to 20 by 20 or 24 by 24 feet (400 to 576 square feet). Compare that to the 150 to 200 square feet a spare bedroom offers, and you can see why the garage wins for anyone who wants more than a yoga mat and a pair of dumbbells.
Ceiling height matters, too. Standard garage ceilings sit at 8 to 10 feet, plenty of clearance for an overhead press inside a power rack. Most basement ceilings in older homes top out at 7 feet, which limits pull-up bars and barbell movements overhead. Your garage clears that restriction.
Then there’s the slab. A 4-inch concrete garage floor handles far more weight per square foot than a standard wood-framed second story. A loaded squat rack with 500 pounds of plates won’t even make the concrete flinch.
The slab won’t crack. The floor joists upstairs might.
How to Plan Your Garage Home Gym Layout by Zone
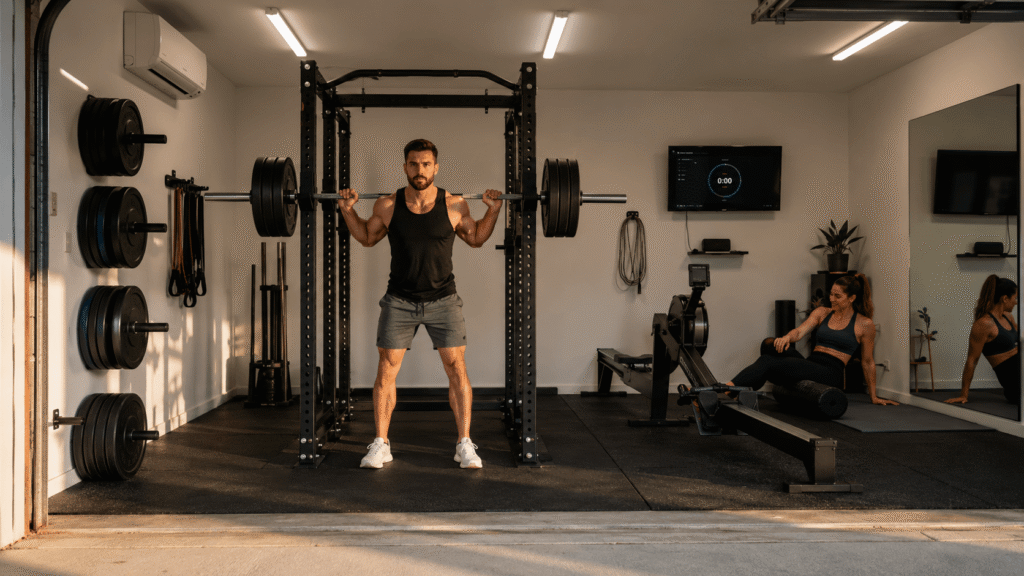
Throwing a rack in the middle of the garage and a treadmill against the wall sounds fine until you realize the barbell path clips the treadmill’s handrail every time you unrack. Building the ultimate home gym starts with zones, not equipment lists. Map each training style to its own footprint before a single plate gets ordered, and you’ll avoid the expensive game of rearranging 300-pound racks after the fact.
Strength Training Zone
Place the power rack or squat stand against the back wall, centered, with at least 4 feet of clearance on each side for plate loading. A standard Olympic barbell measures 7.2 feet long. In a 20-foot-wide garage, centering the rack leaves roughly 6 feet of clearance per side. Keep a rubber horse stall mat (4×6 feet, 3/4-inch thick) directly under the rack and extending 2 feet in front for deadlift space.
Wall-mounted plate storage (brands like Rogue, Titan Fitness, and Rep Fitness all make bolt-on plate trees) keeps 45s off the floor and frees up walking paths. A flat bench stored vertically against the wall between sets takes up less than 2 square feet.
Cardio and Bodyweight Zone
Treadmills need roughly 30 square feet of dedicated space (the machine itself plus a 3-foot safety clearance behind it). A Concept2 rower folds upright and occupies about 6 square feet when stored. An assault bike stays compact at about 4 by 2 feet.
Bodyweight work, from burpees to jump rope, needs 6 by 8 feet of unobstructed floor. Position this zone near the garage door where you can open it for fresh air during high-intensity intervals.
Stretching and Recovery Zone
A 6-by-6-foot corner with a yoga mat, foam roller, and wall-anchored TRX suspension trainer covers mobility and cooldown. Hang a full-length mirror on the adjacent wall for form checks during stretching.
| Zone | Minimum Space | Recommended Equipment | Best Flooring |
|---|---|---|---|
| Strength | 10 x 10 ft (100 sq ft) | Power rack, barbell, plates, bench | 3/4-inch rubber stall mats |
| Cardio / Bodyweight | 8 x 10 ft (80 sq ft) | Rower, bike, jump rope, open floor | 3/8-inch rubber tiles |
| Stretching / Recovery | 6 x 6 ft (36 sq ft) | Yoga mat, foam roller, TRX | Foam tiles or thin rubber |
With all three zones, you’re using roughly 216 square feet. The best garage home gym ideas leave 180+ square feet to spare for storage, walkways, and future equipment.
Flooring That Protects Your Slab and Your Joints
Bare concrete punishes knees, ankles, and dropped barbells equally. And once a barbell cracks the surface, moisture seeps into the slab and creates long-term problems.
Flooring is the first investment, not an afterthought.
Rubber stall mats from farm supply stores (Tractor Supply’s 4×6-foot, 3/4-inch mats run about $60 each) remain the best value in garage gym flooring. Four mats cover an 8×12-foot lifting area for under $250. They absorb deadlift drops, resist sliding, and last for decades. The tradeoff is weight (each mat weighs about 95 pounds) and a rubber smell that fades after two to four weeks.
Interlocking rubber tiles (brands like IncStores, Rogue, and Titan) cost $3 to $8 per square foot and install without adhesive. They look cleaner than stall mats, come in multiple thicknesses, and won’t shift under lateral movement.
Foam tiles work for stretching and bodyweight zones but compress under heavy racks and become unstable for squats. Keep foam in the recovery corner, rubber everywhere else. If off-gassing concerns you (especially in an enclosed garage), look for mats made from recycled rubber with low-VOC certification and air out new mats for two to four weeks before closing the garage door for training sessions.
A full garage conversion that includes professional-grade epoxy underneath the rubber, proper drainage, and sealed expansion joints adds longevity to the entire floor system.
Climate Control That Keeps You Training Year-Round
A garage without insulation hits 90°F or higher in a Dallas July and drops below 40°F in a Seattle January. Equipment doesn’t care. Your body does.
Insulation is the foundation of year-round comfort. R-13 in the walls and R-30 in the ceiling bring a garage in line with standard living-space thermal performance. In Los Angeles and the Bay Area, where winters stay mild, wall insulation alone may be enough. In Dallas, where summer highs push past 100°F, and in Seattle, where damp cold lingers from October through April, adding a ceiling layer changes the space from seasonal to year-round.
Mini-split heat pumps (Mitsubishi, Fujitsu, MrCool DIY) provide both cooling and heating without ductwork. A single 12,000 BTU unit covers a 400-square-foot garage and costs $1,500 to $4,000 installed. Compared to a portable AC that blocks floor space and drains through a hose, a wall-mounted mini-split disappears once installed.
The garage door is the biggest decision. Keeping it lets you roll it open for fresh air during warm-weather workouts and close it when the mini-split runs. An insulated replacement door (R-12 to R-18) blocks heat transfer when closed. Sealing the opening with a framed, insulated wall converts the space permanently but eliminates the ventilation option and may trigger a building permit depending on your city.
Why Your Electrical and Lighting Setup Makes or Breaks the Space
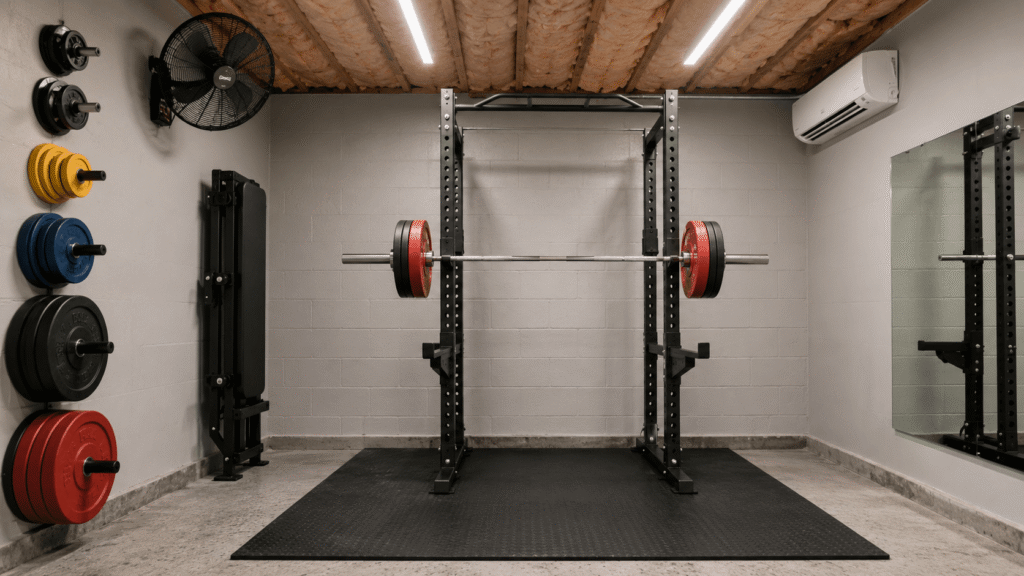
Most garages have a single 15-amp circuit shared between the opener, a light, and maybe an outlet. A treadmill can pull 15 to 20 amps at startup and under heavy load. That circuit will trip.
Dedicated 20-amp circuits (at least two, ideally three) keep your treadmill, mini-split, and sound system on separate breakers. If you’re running a commercial-grade cable machine or an air compressor for a tire station in a half-garage setup, you may need a subpanel. An electrician can add two dedicated circuits for $400 to $800 in most markets.
LED shop lights rated at 5000K (daylight spectrum) eliminate the dim, yellowish cast of the original garage bulb. Four 4-foot LED fixtures at $25 to $40 each light the full space evenly and run on pennies per month.
A full-wall mirror on the long wall opens the space visually and lets you check squat depth and deadlift form without turning your head. Gym-grade mirror panels (1/4-inch glass) cost $5 to $8 per square foot from local glass suppliers. Mounting them on the wall opposite the garage door bounces natural light deep into the room.
Bluetooth ceiling speakers, a wall-mounted TV for workout programming, and a small fan positioned at face height during rowing or cycling round out the space. These finishing details fall under the same home remodeling umbrella that covers any room conversion, from design through final installation.
What a Garage Gym Conversion Costs in 2026
Every home gym in garage project falls into one of three budget tiers. Knowing which tier fits your goals keeps spending focused.
| Tier | Cost Range | What You Get |
|---|---|---|
| DIY Setup | $500 to $2,000 | Rubber stall mats, adjustable dumbbells (Bowflex SelectTech or PowerBlock), pull-up bar, jump rope, fan |
| Mid-Range Build-Out | $5,000 to $15,000 | Rubber tile flooring throughout, power rack, barbell and plate set, bench, mini-split AC, LED lighting, mirrors |
| Full Contractor-Led Conversion | $15,000 to $30,000 | Insulated walls and ceiling, electrical subpanel, epoxy + rubber flooring, mini-split HVAC, framed and finished walls, full equipment loadout |
Roughly 30 to 50 percent of a mid-range or full conversion budget goes to equipment. Another 20 to 40 percent covers flooring, insulation, electrical, and HVAC. Labor makes up the rest.
If the project involves insulation, electrical work, and drywall, a general contractor keeps every trade on schedule and handles permit coordination with your city. EcoStar Remodeling & Construction manages garage home gym conversions as part of their broader garage conversion service across Los Angeles, Dallas, the Bay Area, and Seattle. Because EcoStar is owner-operated and handles framing, insulation, electrical, and finishing under one roof, you’re not scheduling four separate contractors for four separate weeks.
A dedicated project manager tracks the build from the first wall stud through the final walkthrough, and a 2-year workmanship warranty covers everything that isn’t equipment. Financing through partners like Synchrony and Service Finance can spread even a $20,000 conversion into monthly payments.
The Garage Gym Keeps Getting Smarter
Connected fitness platforms, app-controlled resistance machines from brands like Tonal, and AI-driven form-feedback cameras are already turning home gym setups into something commercial gyms struggle to match. The garage gives you the square footage, ceiling height, and privacy those systems need. If you want to create a home gym that lasts a decade and grows with your training, building the infrastructure now (the slab prep, the wiring, the climate control) means the space adapts as equipment evolves.
FAQ
Do I need a permit to convert my garage into a home gym?
It depends on the scope. Dropping rubber mats and a squat rack into an existing garage requires no permit anywhere. But if you’re adding insulation, running new electrical circuits, installing HVAC, or framing walls, most cities require a building permit and inspections.
Will a garage gym hurt my home’s resale value?
A reversible setup (rubber mats, freestanding equipment, no structural changes) has zero negative impact because you can clear it out before listing. A permanent conversion that removes the garage door and adds finished walls can deter buyers who need covered parking. Keeping the garage door and insulating it gives you the best of both worlds.
How do I handle humidity and ventilation in a garage gym?
Sweat, heavy breathing, and steam from a post-workout stretch generate more moisture than most people expect. A wall-mounted exhaust fan (Broan-NuTone makes models rated for garages) paired with a fresh-air intake on the opposite wall creates cross-ventilation that clears humidity in minutes. Adding a standalone dehumidifier set to 50% relative humidity protects rubber flooring, metal barbells, and cable pulleys from rust and degradation between sessions.
What flooring works best if I plan to drop heavy weights?
Horse stall mats (3/4-inch thick, 100% recycled rubber) absorb barbell drops from waist height without cracking the concrete underneath. For Olympic lifting with overhead drops, a dedicated lifting platform (a base layer of 3/4-inch plywood topped with plywood wings on each side and a rubber stall mat section in the center) distributes force more evenly and protects both the floor and the barbell’s knurling.
Can I build a gym in half my garage and still park a car?
Yes. A single parking space needs roughly 9 by 18 feet (162 square feet). A two-car garage at 400 square feet leaves you 238 square feet for gym equipment if you park one car. That’s enough for a power rack, a cardio machine, and a stretching corner. Use a rolling storage rack or wall-mounted fold-up rack (Rogue RML-3W or PRx Performance) to reclaim floor space when the car pulls in.